This might sound a little be narcissistic, but the best part of Smart Slider 3 is our team and our passion. I could give the same brush and canvas for you, what Picasso had, but you wouldn’t be able to make the same kind of paintings as he did. You might have an idea of what kind of slider you want to have, but maybe you are not even there yet, you just want to see something nice on your website. This is where we can help, as we know Smart Slider 3 it the best slider in the world.

The Pro version of Smart Slider 3 doesn’t only come with an installer, but it also comes with our excellent service.
We’ve made tons of demo sliders and amazing features and will make more in the future. It’s easier to have pretty sliders, when a designer makes them. And if you want something, that you’ve seen on a website, but can’t find an option for it, we are available every day to help you find the settings you need! (Or maybe create a new feature to help you achieve the desired result.) Not every feature request is possible to make, or maybe their creation needs more time, and we just put it into our to do list, but we always try to give alternative suggestions in these cases. The Pro version of Smart Slider 3 doesn’t only come with an installer, but it also comes with our excellent service.
Layer animations & Timeline
One of the most important Pro features are the layer animations. Smart Slider 3 uses a powerful layer animation system to give layers motion and transitions. The possibilities of what you can build are endless. There are 14 options in the animation manager to create all sorts of animation effect. If you do the math, you can realize, that these settings give you endless options to make different animations, even if they were only on/off buttons, it’s 87178291200 possibilities. Yep that’s a lot!
Layers
The commonly used layers are available in the free version, but if you want a more unique slider, you could need the layers from the Pro version. For example if you are a developer, you might want to create a search field, a message form or add any html code. I had a job as a website developer, I know, that clients are always asking for options, which aren’t available and for the programmer it can be frustrating to see through the whole code of another developer. This is why we made options to give html code almost anywhere, which means, that you can enter your html, javascript and css codes, and since javascript is able to handle php through ajax requests, you can really add anything to our slider. We made options for the common requests, like input layer, list layer, iframe layer, so there are a lot of customization options without having to write the whole code. But of course you don’t have to write codes at all, if you don’t want to. There are the layers with great design features too, for example the caption and transition layer can be used to make the slides prettier, and more interactive.
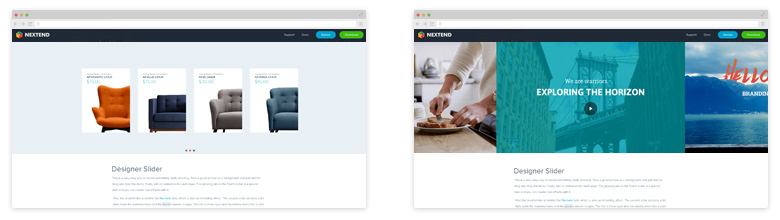
Slider types
The slider types define the functionality of your whole slider. By default, the slider just looks like a regular slider, it has one slide at a time, and you can switch to the next or previous ones. In the Pro version there are a couple more options. For example with the carousel or showcase slider type you can show multiple slides together. The showcase slider type allows you to switch between the slides by clicking on the next or previous slides, and the carousel slider type has a really good responsive behaviour.
Dynamic slides
A lot of websites are built around webshops, galleries or event manager programs, and it could be a lot of pain to add a new product to your webshop every time. For this reason, in my opinion the dynamic slide generators are one of the best features of the Smart Slider 3 Pro version. There are a lot of generators, which cover the most popular extensions, plugins and website services, so you might also be able to find the one you are using among them. And you know that you want to have a product slider, if you own a webshop, everybody does. It can save so much time, and as an advertising tool it will probably bring back it’s price and even more. Generate slides easily from external sources.
Background, Ken Burns and parallax effect
The background, Ken Burns and parallax effect are the most noticeable effects, as they happen with the background images, which usually cover the whole slide. The background animations are all sorts of special effects, while the Ken Burns effect is a zooming animation. This got popular in the last years, since old browsers are slowly disappearing, thus the limitations given by them are disappearing too, and websites don’t need to support them anymore.
Built-in image editor
Adobe Aviary is an online image editing tool, which allows to add different kinds of effects to your images. There are similar ones to Instagram filters, stickers, frames, and you can also correct the not so good images, like change the sharpness or brightness, remove red eyes and even change the size of your picture. This is more, than what the default image editing programs are able to do, and you don’t need Photoshop for everything, so we implemented Adobe Aviary into our code.
Click actions
Our link options weren’t only made to put links in them, but in the Pro version you can also put lightboxes or actions into them. Lightboxes can show images, vimeo videos, youtube videos and iframes, so basically you can show anything in them if you take your time. Even more you can make your link scroll to a specific part of your website. The second option what you can do, and more related to the slider is that you can make your slider to switch to any of your slides. So you don’t need arrows, bullets or anything, just the layers what you put down, or use your whole slide as a link. And the last option is that you can trigger the layer animations, which means that when you make layer animations, you can add event names to them, and you can use these events to make them start with a click event, rather than letting them come in, when you switch to the slide. There are more event triggers at the animations settings of the layers, like mouse-enter or video stop.
Controls
The difference between the free and the Pro version’s controls are rather the customization options. The important controls are available in the free version, like the arrows, autoplay button and thumbnails, but in the Pro version there are the text, image bar, slide and slide title arrows, the autoplay indicator and the vertical thumbnails, which put greater designing tools in your hand.
Expert settings
There are a lot of options in Smart Slider 3, because we are trying to put every feature request inside it, but for a newbie this could be a little overwhelming. For this reason, we made a simple/expert switcher, which hides the not so important settings, and makes our backend more user friendly. When we had to decide, which part would get into the free version, we chose to skip the whole expert part, so all of the options, what you can read in our documentation with expert tag next to its name are only available in the Pro version. The most important ones are the device related options, like giving different slider sizes for different devices (landscape and portrait views), hide controls on desktop, tablet or mobile views and give different background images for different devices including retina image options.
Are your ready to take advantage of all of the amazing features packed into Smart Slider 3 PRO? If you still have any doubts watch our “Why upgrade to PRO” video!
Our favorite links this week
We curate web design and development related content for you week by week. Useful, interesting and educational links that you might want to visit.
- Is Smart Slider 3 the Best WordPress Slider Plugin on the Market?
I rarely write plugin reviews, and I never write about sliders. But today I’m making an exception… - WP.org to WordPress
“Donating wp.org to the WordPress Foundation is the least that I could do.” - Oops, Google failed its own website testing tool
That awkward moment when Google fails its own website testing tool - Smart Responsive Design Patterns
This article features some of the slightly more obscure design patterns…