Table of contents
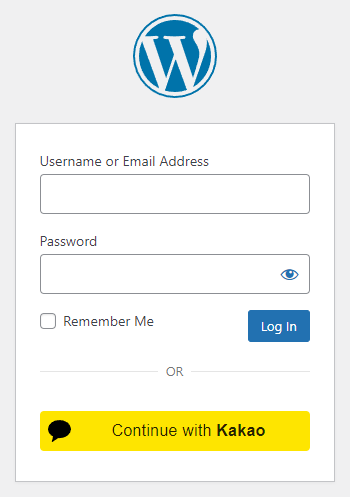
How to enable Kakao login in WordPress
1. Create a Kakao App
To be able to log in via Kakao you must create a Kakao app first.
- Navigate to https://developers.kakao.com/console
- Log in with your Kakao credentials if you are not logged in.
- Click on the blue "Add an application" button!
- Select an image for your App, fill in the "App Name" and "Company name" fields, select a "Category" then comply with the "Operating Policy", then click on the "Save" button!
- Once you have a project, click on it, and you will enter the Dashboard.
- Below the "Product Settings" menu on the left, click on the "Kakao Login" menu point, then set the "Kakao Login Activation State" ON-OFF switch to ON. A popup will appear, where you should click the "Activate" button.
- Scroll down to the "Redirect URI" section, then click on the "Register Redirect URI" button, and enter the URL we suggest at step 7 in the Getting Started guide for Kakao in Nextend Social Login.
- Press the "Save" button
- After this, click on the "Constent Items" menu point on the left.
- Click on the "Set" button for the Scopes with the "Scope ID" and for any other scope that you will need.
- "profile_nickname" – Purpose: Used for the username generation and for setting the first name and last name.
- "profile_image" – Purpose: This image will be used as the avatar of the account.
- "account_email" (optional – requires business verification) – Purpose: Accounts will be registered or linked based on this email address.
In the popup you should set the "Consent Type" to either "Optional consent" or "Requited consent" depending on your needs.
Finally, fill the "Purpose of consent" field. It is important to clearly state what you want to use the consent item for.
WARNING: Certain scopes, e.g. "Email", or e.g. "Birth year", "Phone number" (used when you turn on the corresponding setting in our Sync data tab), will require you to register business information, or if you are a single developer, verify your identity (both can be done under the "Business" menu point), in order to be able to request consent to these items. - Next, go to the "Platform" in the "App Settings" menu on the left.
- Click on the blue "Register Web platform" button, then enter your domain name into the "Site Domain" field.
- Press the "Save" button.
- Then in the side bar on the left side, find the "Product Settings" menu and click on the "Security" menu point. Click on the "Generate code" button, then on "Generate".
Copy and save this code, this is what you will use for the "Client Secret Code" on the Settings tab. Also, make sure to set the "Activation state" to "Enabled" with the "Set" button. - Lastly, go to the "App keys" menu and copy and save the "REST API Key" value. This is what you will use later on the Settings tab for the "REST API Key" field.
2. App setup
Once your Kakao app is ready you’ll need to copy and paste the REST API Key and Client Secret Code to the Kakao provider’s Settings tab.
3. Verifying
Once your REST API Key and Client Secret Code have been added you need to verify the setup first. This verification helps you identify possible problems with the app.
Settings
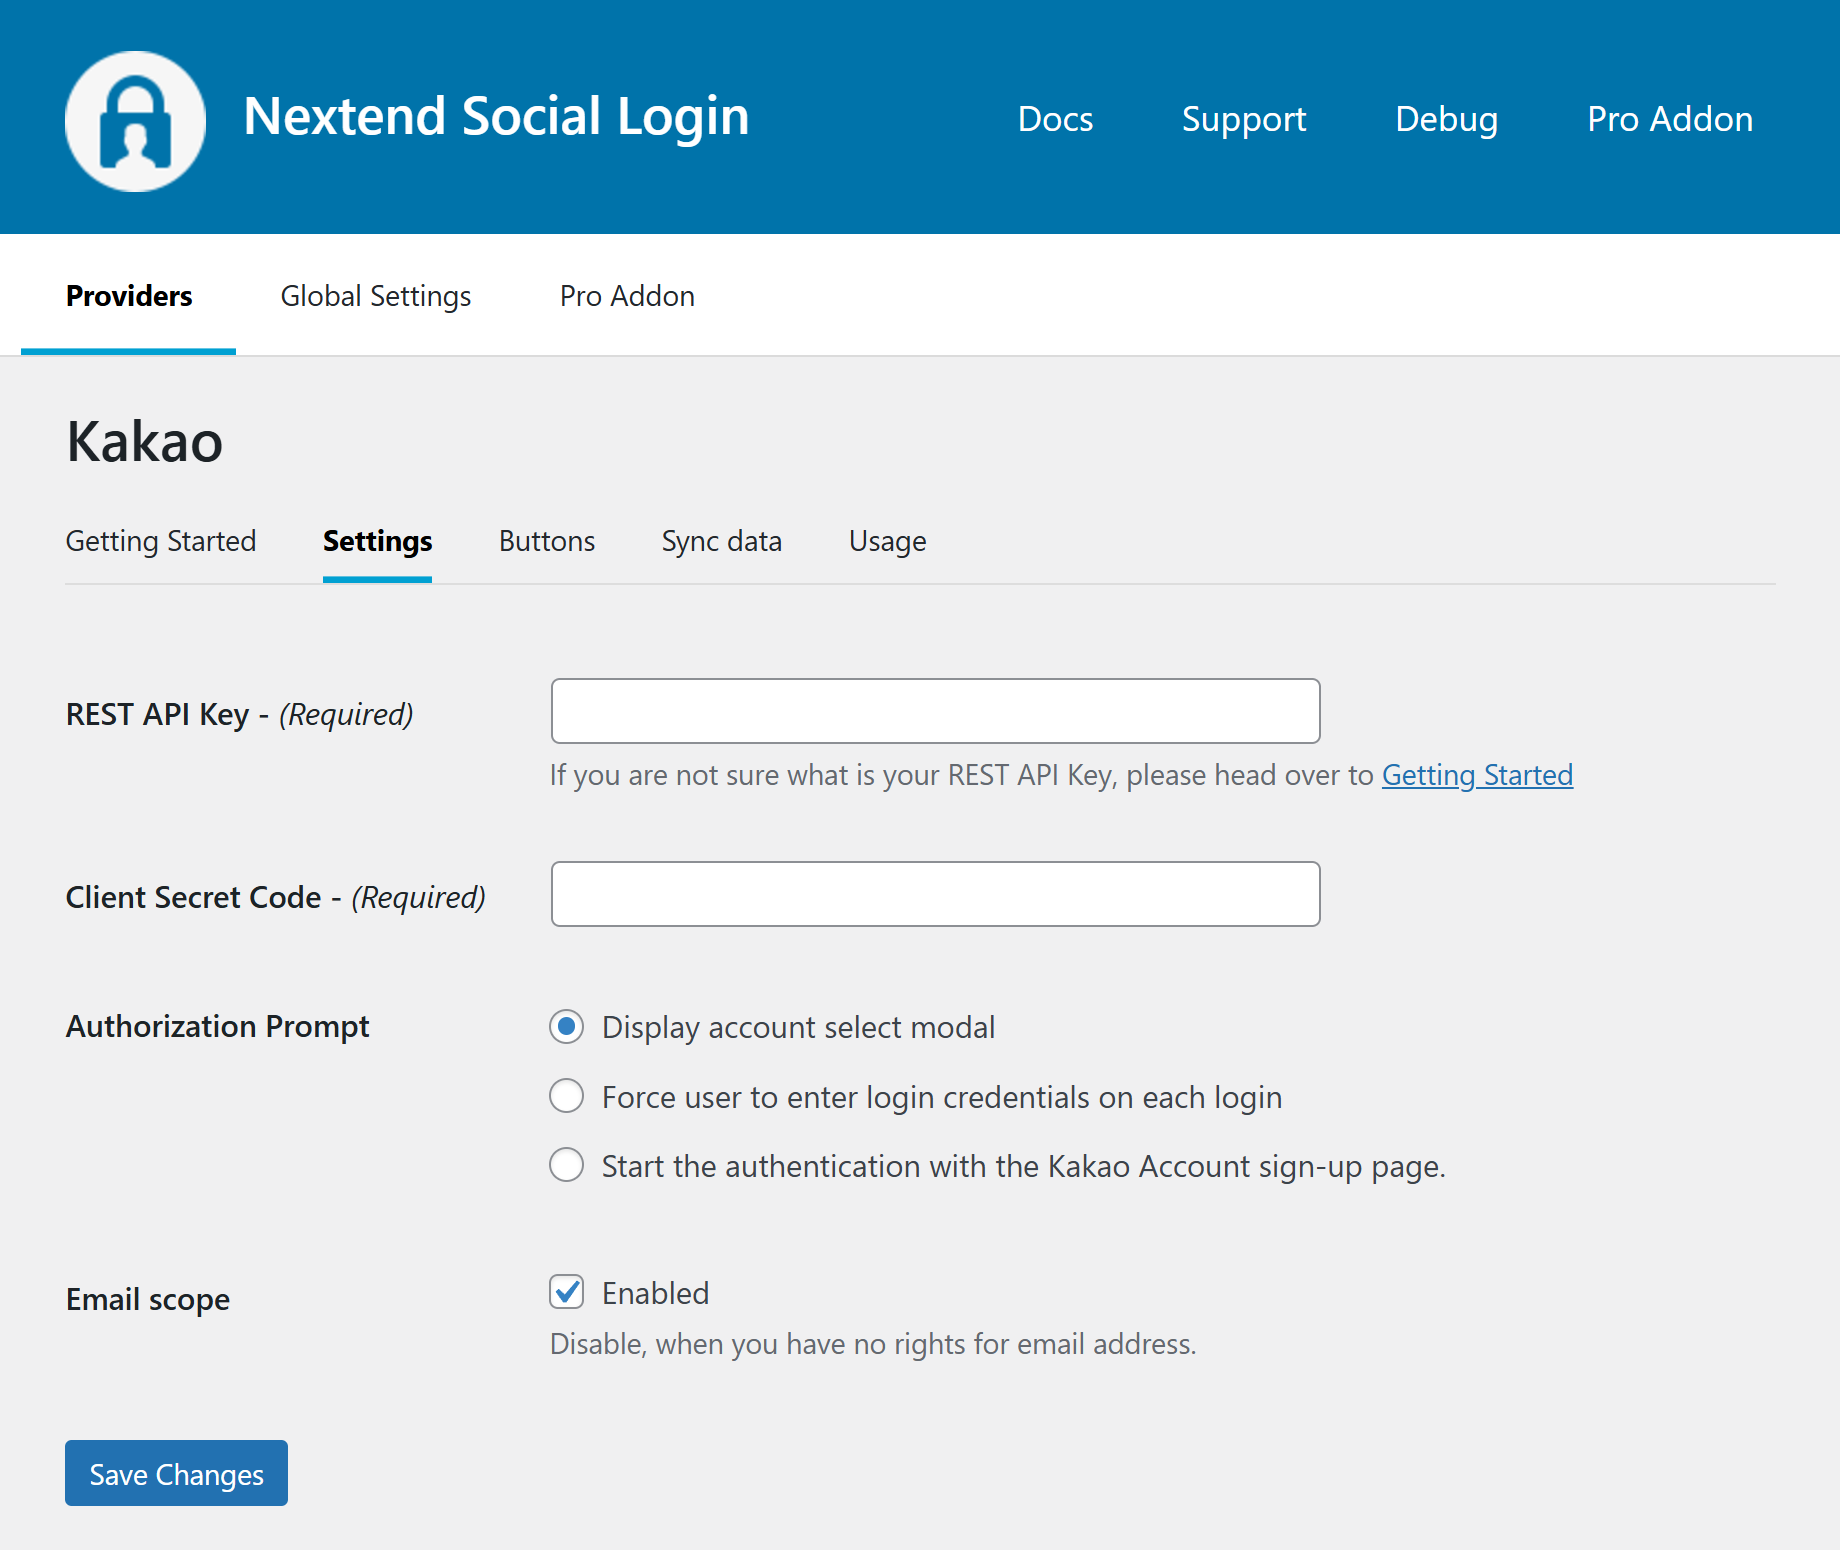
REST API Key
The REST API Key of your Kakao app. You can find it at under your App’s Summary section.
Client Secret Code
The Client Secret Code of your Kako app. You can find it at under your App’s Security section.
Authorization Prompt
Authentication mode for Kakao.
-
Display account select modal
If the user has a login session, they will be logged in automatically, or if there are multiple login sessions, then the Account select modal will be shown. -
Force user to enter login credentials on each login
Every time the user wants to login with social login, they will be prompted to enter their credentials, even if they have a login session. -
Start the authentication with the Kakao Account sign-up page.
Show the sign-up page instead of the login.
Email scope
To be able to request the email of the user, you’ll need to switch your App to Bizz mode, and that needs to be approved by Kakao.
By disabling this option, the email won’t be requested, so users will be able to login with Kakao even when the App is not approved yet.
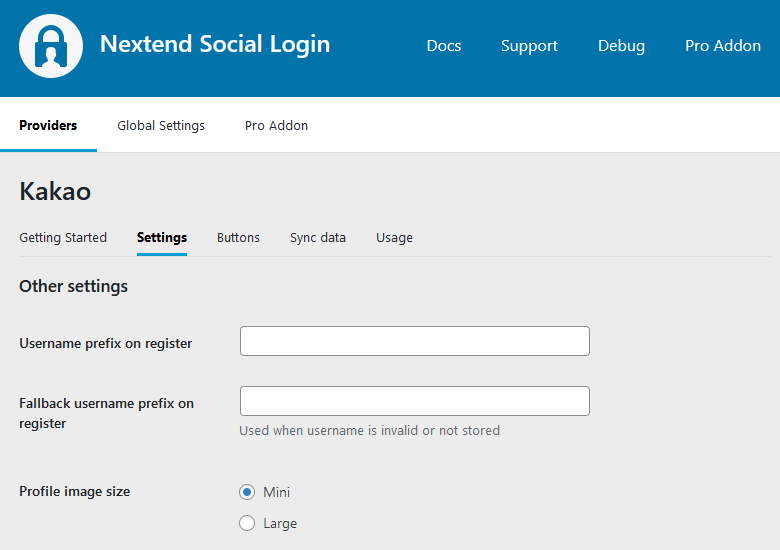
Username prefix on Register
Whenever a new user registers with their Kakao account they can get a custom prefix so you can easily identify them.
Fallback username prefix on register
Whenever a new user registers with their Kakao account and we can not generate a valid username from the first name or last name, a random username will be generated. With this option they can get a custom prefix so you can easily identify them.
Profile image size
The avatar will be stored with the selected size.
Sync data
By default Nextend Social Login stores the first name, last name, email, avatar url and access token if it is possible, however some additional information can also be retrieved and stored.
When an option is checked, that field will be stored in a meta key with the specified name.
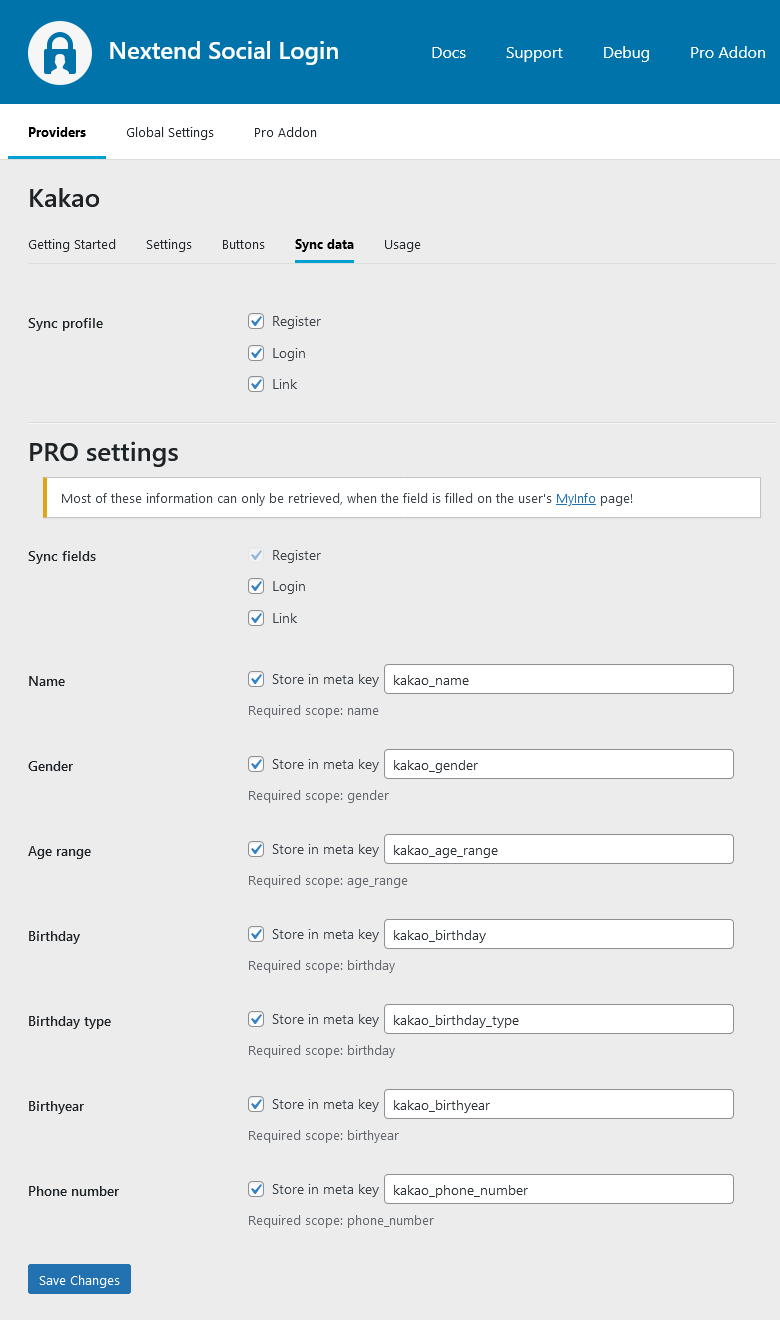
Sync fields
It determines when the synchronization shall happen.
- Register: whenever a new user registers with a provider, their data will be retrieved and stored.
- Login: whenever user logs in with a provider, their data will be retrieved and stored.
- Link: whenever user links and existing WordPress account with a provider, their data will be retrieved and stored.
Design Guidelines
According to the Kakao Design Guidelines, the button needs to comply with the requirements. Our design matches this requirement. Avoid using custom designs, as that can get your Kakao login disabled.
Common error messages returned by Kakao during verification
Admin Settings Issue
Admin Settings Issue (KOE006)
You are either missing or don’t have a correct Redirect URI set in your App.
In this case, review step 12 in the Kakao Getting Started Guide in Nextend Social Login, and use the URL we suggest.
Admin Settings Issue (KOE004)
You do not have the Kakao Login enabled. Navigate to “Kakao Login” in the “Product Settings” menu, and set the “Kakao Login Activation” State to ON (step 11).
Admin Settings Issue (KOE101)
You have used the wrong REST API Key (Make sure to copy the value, don’t enter it by hand to avoid typos!).
Error: invalid_client: Bad client credentials
You have used the wrong Client Secret Code (Make sure to copy the value, don’t enter it by hand to avoid typos!).
Invalid request
Invalid Request (KOE205)
This error is shown when you do not have permission to a scope e.g. the email.
Limitations
Don’t replace the Kakao App if you have users connected with Kakao
Whenever a person connects with Kakao login, an ID will be created, which is unique for the specific Kakao app that the login happened over. If the same person tries to login over another Kakao App, the person will receive another, completely different ID.
In Nextend Social Login, we use these IDs to recognize the WordPress account that the Kakao account was linked with. So if you replace the Kakao App, users with linked Kakao Accounts will no longer be able to login with the new App.
If you really need to replace the Kakao App, then users with linked Kakao accounts can only login with Kakao, if the person:
- logs in with the traditional username and password form or maybe with another provider that is also linked to the account
- unlinks the currently linked Kakao account
- and links the Kakao account again, using the new Kakao App
Each user can find the Link and Unlink buttons on the WordPress default profile page, e.g.:
- https://yoursite.com/wp-admin/profile.php
or you can display the Link and Unlink buttons using:
- the Nextend Social Login widget with Show link/unlink buttons enabled
- or the shortcode with the link and unlink parameters.