Table of contents
- How to enable the provider
- Settings
- How to modify the supported account types for my Microsoft App?
- Common error messages
- Limitations
How to enable Microsoft login in WordPress
1. Create a Microsoft App
To be able to log in via Microsoft you must create a Microsoft app first.
- Navigate to https://portal.azure.com/
- Log in with your Microsoft Azure credentials if you are not logged in or create a new account.
- Click on the Search bar and search for “Microsoft Entra ID”.
- If you are shown an error message, press “Ignore”. (You might have to do this a couple of times.)
- Then, on the top menu click on “Add”, and then “App registration”.
- Click on “New registration”.
- Fill the “Name” field with your App Name.
- Select an option at Supported account types.
Important: On our Settings tab, you will need to select the Audience depending on the selected value! If you are not sure what to choose, then here you can learn more. - At the “Redirect URI (optional)” field, select the “Web” option as platform, and add the URL that Nextend Social Login suggests at the backend.
- Create your App with the “Register” button.
- You land on the “Overview” page.
- Copy the “Application (client) ID”, this will be the Application (client) ID in the plugin settings.
- Click on the link named “Add a certificate or secret” next to the Client credentials label.
- Click on “New client secret”.
- Fill the “Description” field.
- Set the expiration date at the “Expires” field.
- Then create your Client Secret with the “Add” button.
- Copy the “Value”, this will be the Client secret in the plugin settings.
2. App setup
Once your Microsoft app is ready you’ll need to copy and paste the Application (client) ID and Client Secret Value to the Microsoft provider’s Settings tab. You can find the information at your Microsoft app’s Overview panel.
3. Verifying
Once your Application (client) ID and Client Secret Value has been added you need to verify the setup first. This verification helps you identify possible problems with the app.
Settings
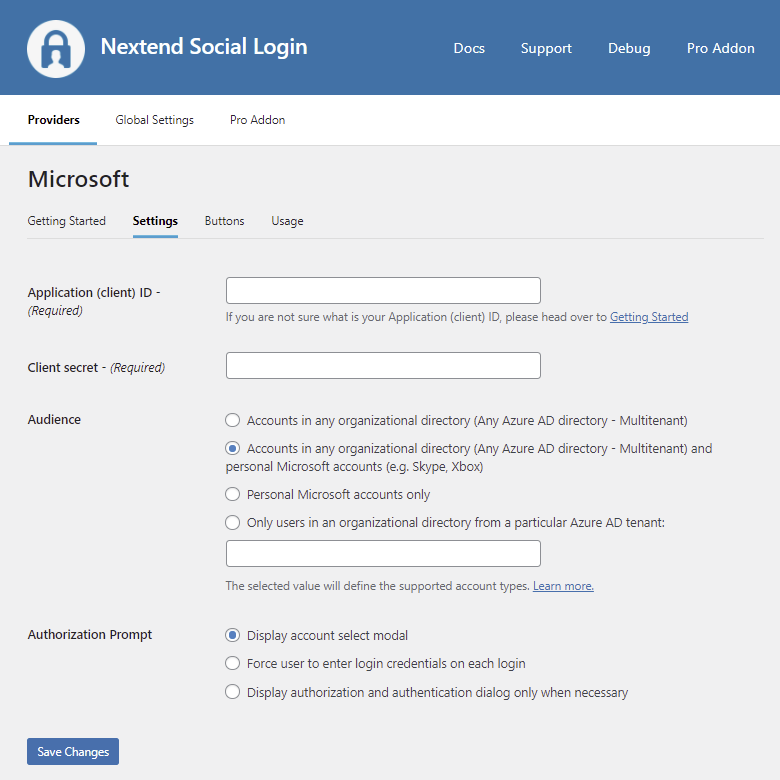
Application (client) ID
The Application (client) ID of your Microsoft app. You can find it at your App’s Overview panel.
Client Secret
The Client Secret of your Microsoft app. You can find it at your App’s Overview panel.
Audience
- Accounts in any organizational directory (Any Azure AD directory – Multitenant): Allows only users with work/school accounts from Azure AD to sign into the application. Personal Microsoft accounts can not use the Microsoft button to login when this option is selected.
- Accounts in any organizational directory (Any Azure AD directory – Multitenant) and personal Microsoft accounts (e.g. Skype, Xbox): Allows users with both personal Microsoft accounts and work/school accounts from Azure AD to sign into the application.
- Personal Microsoft accounts only: Allows only users with personal Microsoft accounts (MSA) to sign into the application. Work and School Microsoft accounts can not use the Microsoft button to login when this option is selected.
- Only users in an organizational directory from a particular Azure AD tenant: Allows only users with work/school accounts from a particular Azure AD tenant to sign into the application. Either the friendly domain name of the Azure AD tenant or the tenant’s GUID identifier can be used. Personal Microsoft accounts can not use the Microsoft button to login when this option is selected.
-Available since: 3.1.2
Authorization Prompt
- Display account select modal: Whenever a user connects, Microsoft will display the account select modal to choose an account that the user used recently.
- Force user to enter login credentials on each login: Whenever a user connects, Microsoft will force the user the enter the email address and the password.
- Display authorization and authentication dialog only when necessary: Microsoft will only display the OAuth consent screen if the person hasn’t granted permission for the App. Also if there is a logged in Microsoft account then Microsoft will automatically log the account in.
-Available since: 3.1.2
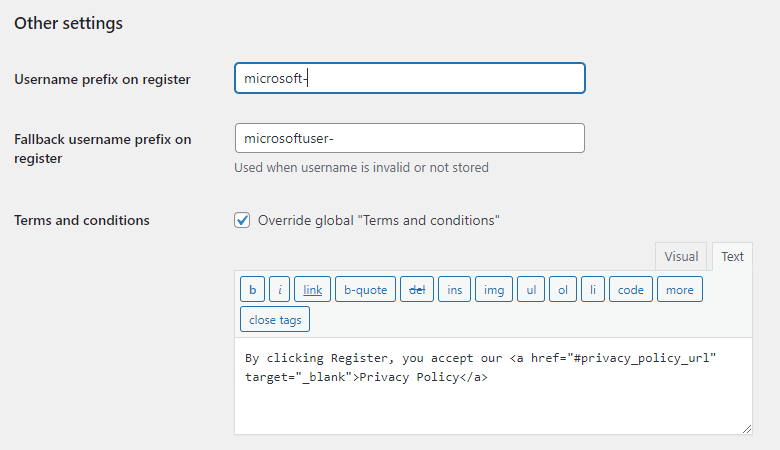
Username prefix on Register
Whenever a new user registers with their Microsoft account they can get a custom prefix so you can easily identify them.
Fallback username prefix on register
Whenever a new user registers with their Microsoft account and we can not generate a valid username from the first name or last name, a random username will be generated. With this option they can get a custom prefix so you can easily identify them.
Terms and conditions
This option can only be seen, if Terms and conditions is set to Show in Global Settings → Privacy tab. Here you can set custom Terms and Conditions for users who register with Microsoft. For more information please read our GDPR documentation.
How to modify the supported account types for my Microsoft App?
If you accidentally chose the wrong value for “Supported Account Types” then don’t worry you can modify it in the Manifest file of your Microsoft App.
- For this you need to visit the Microsoft Azure Portal.
- Enter “App registrations” into the search field and click on it in the search results.
- Click on the name of the App that you configured Nextend Social Login with. If you have multiple Apps, and you are not sure which one you used, then check the Settings tab of the Microsoft provider in Nextend Social Login and inspect the “Application (client) ID” value that you entered. You should find that ID at the Azure Portal under the Application (client) ID column.
- Click on the “Manifest” option that you will find on the left side of the App, under the “Manage” section.
- An editor will be opened that displays a JSON code that contains all of the configurations of your App. Before making any modifications, please download the current configuration by pressing the “Download” button. This way you will have a backup if you make a mistake with the modifications. Keep this file safe!
- In the editor scroll down to the bottom and find the “signInAudience” key. It will look something like this:
"signInAudience": "PersonalMicrosoftAccount",
The specified value ( in this case “PersonalMicrosoftAccount” ) will define the supported account types. Modify it according to your needs. The supported values are:- AzureADMyOrg – Users with a Microsoft work or school account in my organization’s Azure AD tenant (for example, single tenant)
- AzureADMultipleOrgs – Users with a Microsoft work or school account in any organization’s Azure AD tenant (for example, multi-tenant)
- AzureADandPersonalMicrosoftAccount – Users with a personal Microsoft account, or a work or school account in any organization’s Azure AD tenant
- PersonalMicrosoftAccount – Personal accounts that are used to sign in to services like Xbox and Skype.
The supported values can change in the future, but you can always check these values in the official documentations of Microsoft.
Common error messages returned by Microsoft during verification
client_id is incorrect
unauthorized_client: The client does not exist or is not enabled for consumers.
The Application (client) ID you copied from the Microsoft app is invalid. Make sure the correct one was copied.
client_secret is incorrect
Error: invalid_client: CODE: Invalid client secret is provided.
The Client secret you copied from the Microsoft app is invalid. Make sure the correct one was copied.
Missing parameter(s): code
{“code”:”rest_missing_callback_param”,”message”:”Missing parameter(s): code”,”data”:{“status”:400,”params”:[“code”]}}
This error can happen if you created an app where the Supported account types is set to Personal, but changed the Audience to “Accounts in any organizational directory (Any Azure AD directory – Multitenant) and personal Microsoft accounts (e.g. Skype, Xbox)”. If you need this Audience, you’ll need to modify the app type.
Limitations
Redirect URIs must have a common root domain
Microsoft has multiple Redirect URL specific limitations, one of them is that you are only allowed to enter URLs of the same root domain.
For example these will be allowed:
- https://example.com/page1
- https://example.com/page2
- https://subdomain.example.com/page2
- https://subdomain2.example.com/page3
However please note that, you can only add additional sub-domains if the main domain is added already!
But adding URLs with different root domains are not allowed, e.g.:
- https://example.com/page1
- https://example.de/page1
Possible workarounds:
- If each site works from its own database – e.g. multisite –: then you should create a different Microsoft App for each domain.
- If each site works from the same database: then you should avoid using different domain names. Instead you should use sub-domains patterns as described in the examples above, or sub-folder patterns