Table of contents
- Available Languages
- How to translate the login buttons?
- How to translate Nextend Social Login with language files?
- How to translate Nextend Social Login with Loco Translate?
Available Languages
Thanks to the community, currently Nextend Social Login have translation files for the following languages:
- German (de_DE) – 0%
- Spanish (es_LA) – 41%
- French (fr_FR) – 0%
- Hungarian (hu_HU) – 41%
- Dutch (nl_NL) – 63%
- Portuguese (pt_BR) – 55%
- Russian (ru_RU) – 2%
- Chinese (zh_ZH) – 34%
- Italian (it_IT) – 91%
How to translate the login buttons?
You can edit the label of the login buttons at [provider] → Buttons tab.
If you’re running a multilingual site, we rather recommend pressing the Reset to default button below each label’s text, then you’ll be able to translate the buttons via translation files.
How to translate Nextend Social Login with language files?
You can translate Nextend Social Login locally on your computer!
1.) Locate the translation files
You can find the translation files at the following locations on your server:
- /wp-content/plugins/nextend-facebook-connect/languages
Use FTP to reach them. If you’re looking at the zipped installers, you can find the files at:
Find the nextend-facebook-connect.pot file and download it to your computer.
2.) Creating the translation file.
To be able to create and edit the translation, you will need to have a po editor. You can find online editors, or use any downloadable editor you want. In this tutorial I’m going to use Poedit. It’s free and very intuitive.
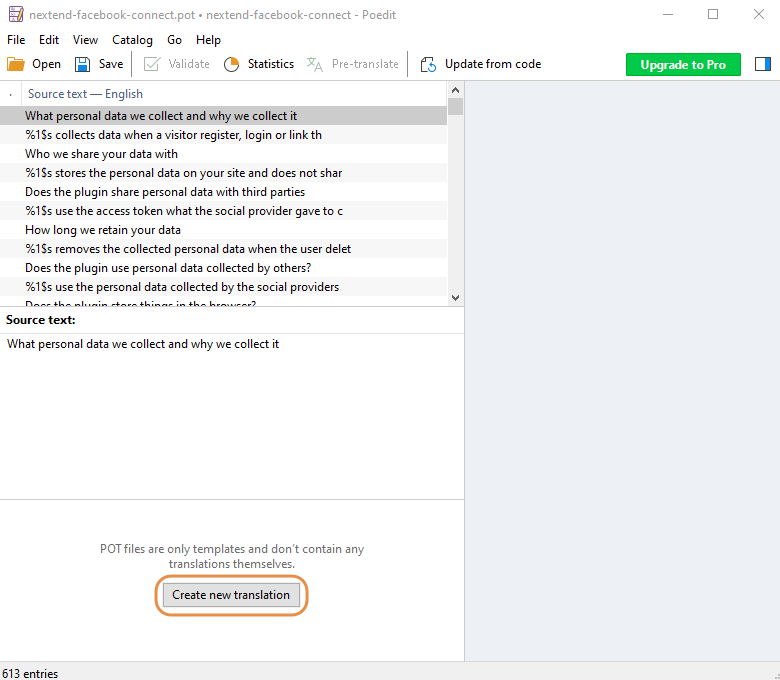
After you installed Poedit open the nextend-facebook-connect.pot file. The editor interface is divided into two columns, and the first column has 3 rows. Find the Create new translation button at the bottom row and click on it:
then in the popup, select the language you want to translate Nextend Social Login to.
3.) Translation
Poedit will create a .po file for you for translating. Here’s a quick overview on Poedit:
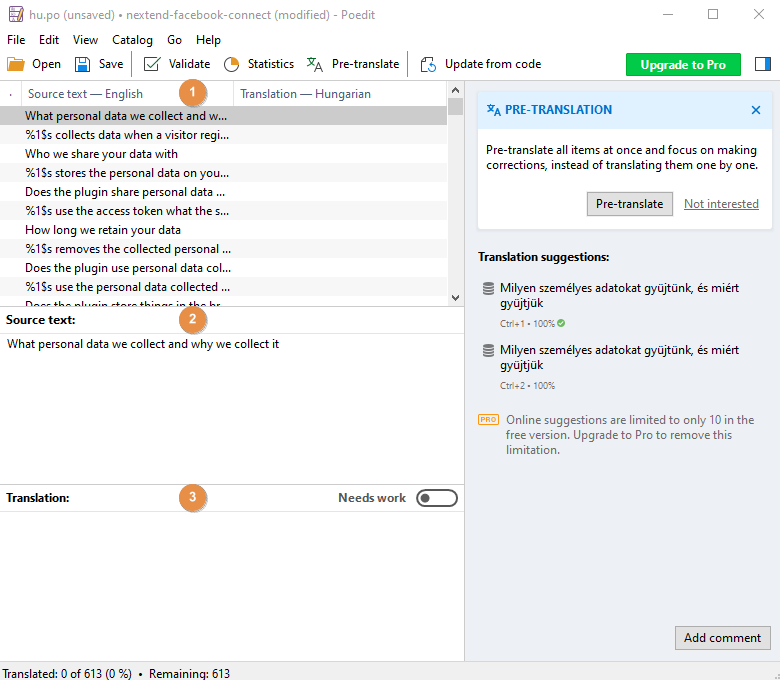
- This is where you can see all texts. You can select the one you want to translate by clicking on it.
- At the Source text field you can see the text you’re currently translating.
- At the Translation field you can edit the translation you’re making.
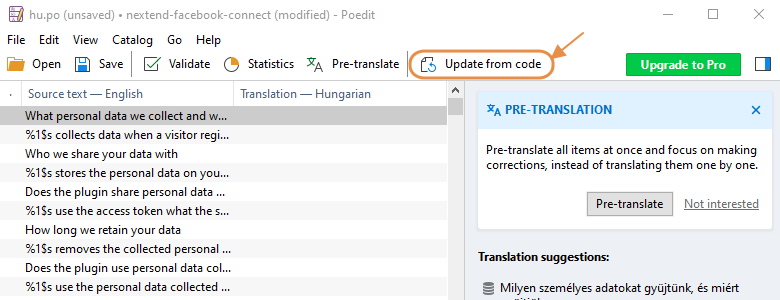
Before starting the translation, you should press the Update from code button to ensure you’re translating the latest strings.
To save your work, press the Save button.
4.) Checking the translations
If you would like to view the translation you made, upload the created .mo file back to your server:
- /wp-content/plugins/nextend-facebook-connect/languages
Make sure that the translation file is named like this: nextend-facebook-connect-en_GB.mo, using hypen between the plugin name and an underscore between the language code.
5.) Send the language file to us
When you finish your translation, feel free to contact us and send us the .po file, so that we can include it in the next versions.
Note: If you’re making a customized translation (such as to use a different OR text) you could place your translations to your wp-content\languages\plugins folder, like so:
\wp-content\languages\plugins\nextend-facebook-connect-en_US.mo
\wp-content\languages\plugins\nextend-facebook-connect-en_US.po
And they wouldn’t be erased by the next plugin update.
How to translate Nextend Social Login with Loco Translate?
You can also translate Nextend Social Login directly on your site, using the plugin called Loco Translate.
To make a custom translation:
- In the side bar, click Loco Translate and select Plugins
- From the list you need to choose Nextend Social Login
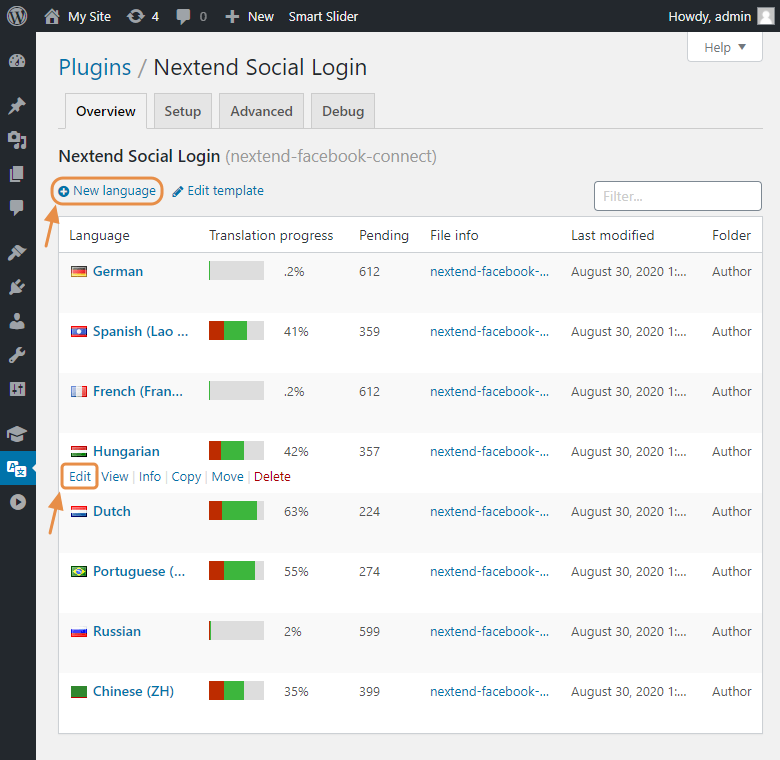
- Here you can edit existing translation files or create new ones:
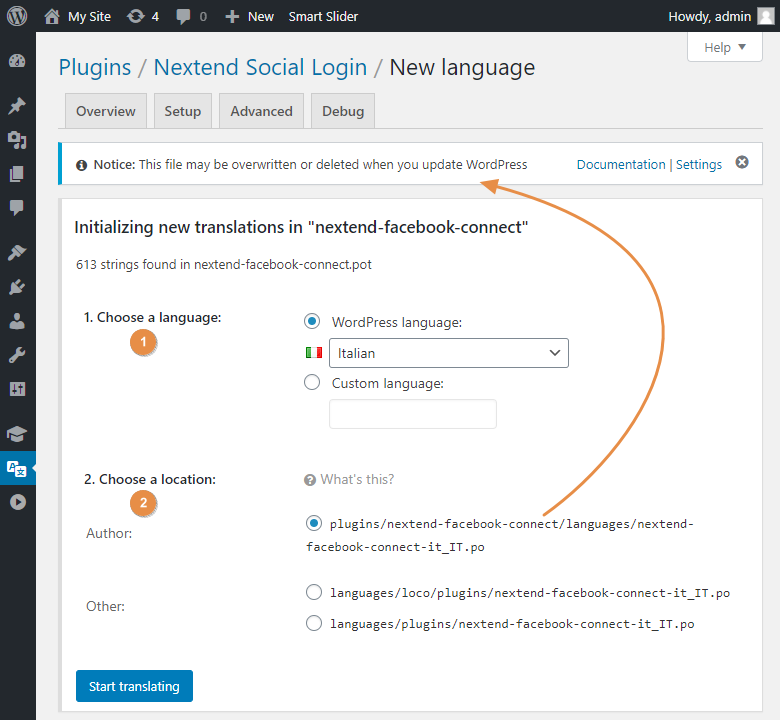
- Next choose the language and the location. It is important to mention that, if you save the translation into the installation folder of the plugin, your translation will be lost if you update the plugin. A message also warns you about this. For this reason you probably want to store your translation in the custom folder created by Loco Translate ( languages/loco/plugins/ ).
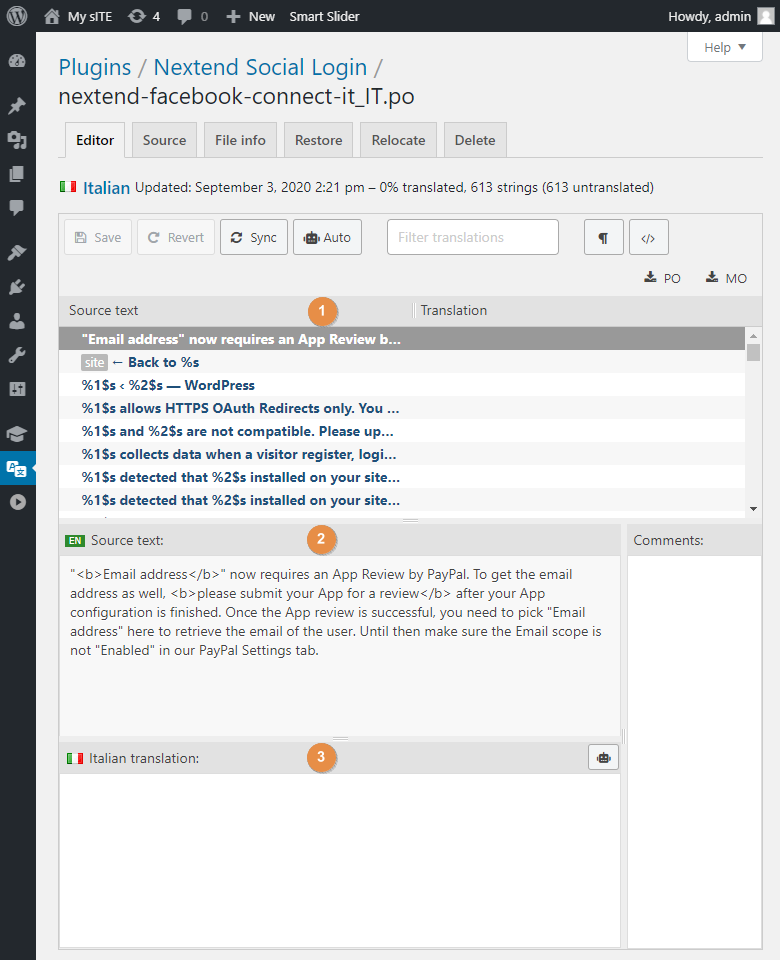
- Finally start the translation of the strings:
1.) This is where you can see all texts. You can select the one you want to translate by clicking on it.
2.) At the Source text field you can see the text you’re currently translating.
3.) This is where you need to enter the translated version of the text that you translate.