Table of contents
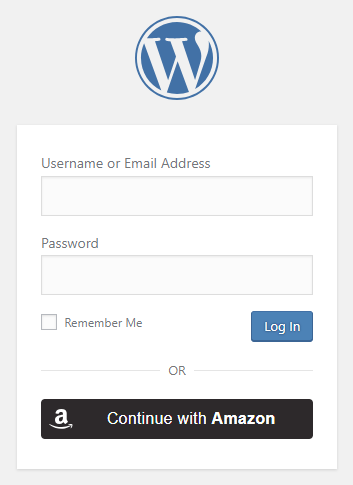
How to enable Amazon login in WordPress
1. Create an Amazon App
To be able to log in via Amazon you must create an Amazon app first.
- Navigate to https://www.amazon.com/
- Log in with your Amazon credentials if you are not logged in.
- Visit https://developer.amazon.com/lwa/sp/overview.html
- If you don’t have a Security Profile yet, you’ll need to create one. You can do this by clicking on the orange “Create a New Security Profile” button on the left side.
- Fill “Security Profile Name”, “Security Profile Description” and “Consent Privacy Notice URL”.
- Once you filled all the required fields, click “Save”.
- On the right side, under “Manage”, hover over the gear icon and select “Web Settings” option.
- Click “Edit”.
- Fill “Allowed Origins” with the url of your homepage. E.g. https://yoursite.com
- Into the “Allowed Return URLs” field add the URL that Nextend Social Login suggests at the backend.
- When all fields are filled, click “Save”.
- Find the necessary “Client ID” and “Client Secret” at the middle of the page, under the “Web Settings” tab.
2. App setup
Once your Amazon app is ready you’ll need to copy and paste the Client ID and Client Secret to the Amazon provider’s Settings tab. You can find the information at your Amazon app’s Settings which you can reach from the left sidebar.
3. Verifying
Once your Client ID and Client Secret has been added you need to verify the setup first. This verification helps you identify possible problems with the app.
Settings
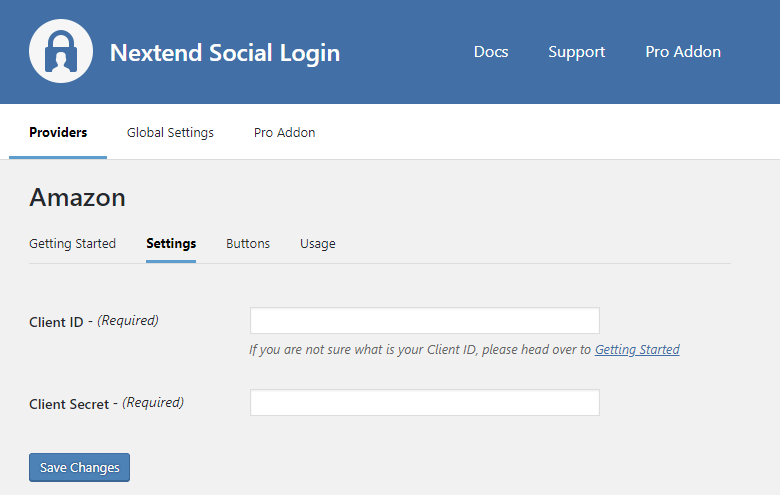
Client ID
The Client ID of your Amazon app. You can find it at your App → left menu: Settings.
Client Secret
The Client Secret of your Amazon app. You can find it at your App → left menu: Settings.
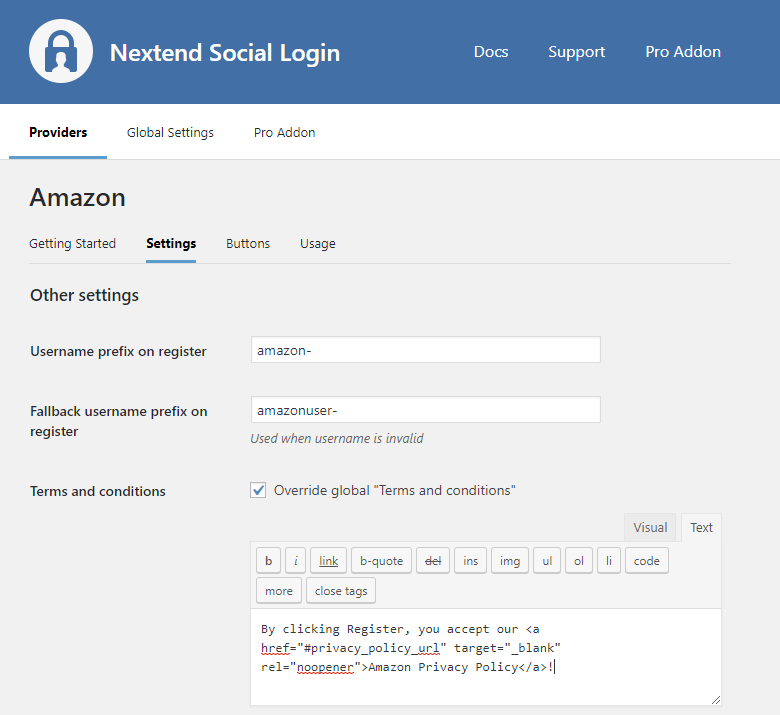
Username prefix on Register
Whenever a new user registers with their Amazon account they can get a custom prefix so you can easily identify them.
Fallback username prefix on register
Whenever a new user registers with their Amazon account and we can not generate a valid username from the first name or last name, a random username will be generated. With this option they can get a custom prefix so you can easily identify them.
Terms and conditions
This option can only be seen, if Terms and conditions is set to Show in Global Settings → Privacy tab. Here you can set custom Terms and Conditions for users who register with Amazon. For more information please read our GDPR documentation.
Common error messages returned by Amazon during verification
Redirect URI has not been whitelisted
400 Bad Request
The redirect URI you provided has not been whitelisted for your application. Please add your redirect URI in the ‘Allowed Return URLs’ section under ‘Web Settings’ for your Security Profile on Amazon Developer Portal.
The problem is that the entered Allowed Return URLs field is not correct for your app. Check the 10th step of the App setup to fix the problem.
Unknown client_id
400 Bad Request
Unknown client_id
The entered Client Id is not correct. Maybe the app with the entered ID was deleted. Go to the Amazon provider → Settings and make sure that an existing App’s Client Id and Client Secret was entered.
Invalid_client Error
Error: invalid_client: Client authentication failed
The Client Secret you copied from the Amazon app is invalid. Make sure the correct one was copied.
An unknown scope was requested
Error: invalid_scope: An unknown scope was requested
The problem usually related to that, your Amazon app doesn’t have its “Consent Privacy Notice URL” field filled. To fix the problem you need to navigate to the “Security Profile” page of your App, and enter your Privacy Policy url.