Table of contents
- How to enable Apple login in WordPress
- Settings
- Apple Human Interface Guidelines compatibility
- Common error messages returned by Apple
- Registration limitations
How to enable Apple login in WordPress
Apple provider requires active subscription for the Apple Developer Program which costs 99 USD per year.
1.) Create the Apple App
- Navigate to https://developer.apple.com/account/resources/identifiers/list
- Click the blue + icon next to Identifiers, then select the App IDs option and click the “Continue” button.
- Choose the “App” option as type and press the “Continue” button.
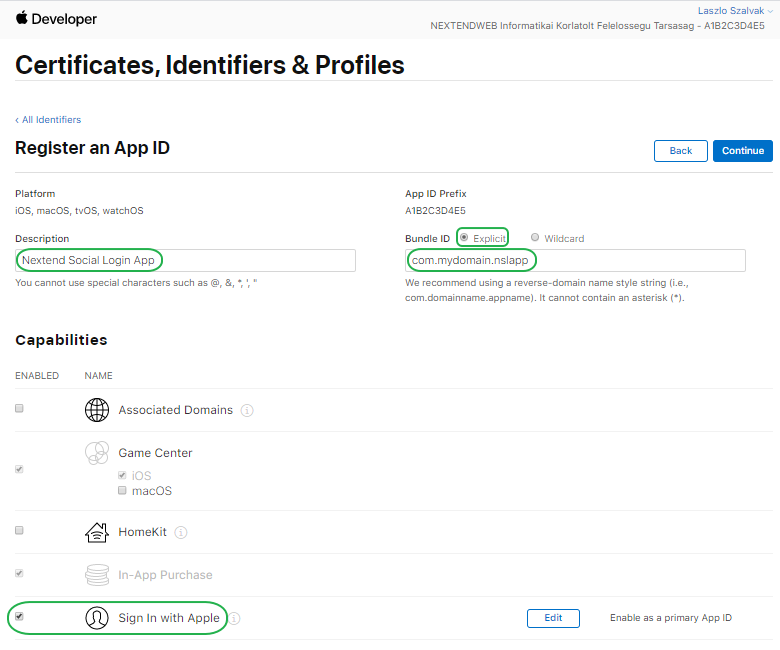
- Enter a “Description“
- At the “Bundle ID” field select the “Explicit” option and enter your domain name in reverse-domain name style, with the name of the app at its end. E.g.: com.mydomain.nslapp
- Under the “Capabilities” section, tick the “Sign In with Apple” option.
- Scroll up and press the “Continue” button and then the “Register” button.
2.) Create the Apple Key:
- On the left hand side, click on the “Keys” tab.
- Click the blue + icon next to Keys heading.
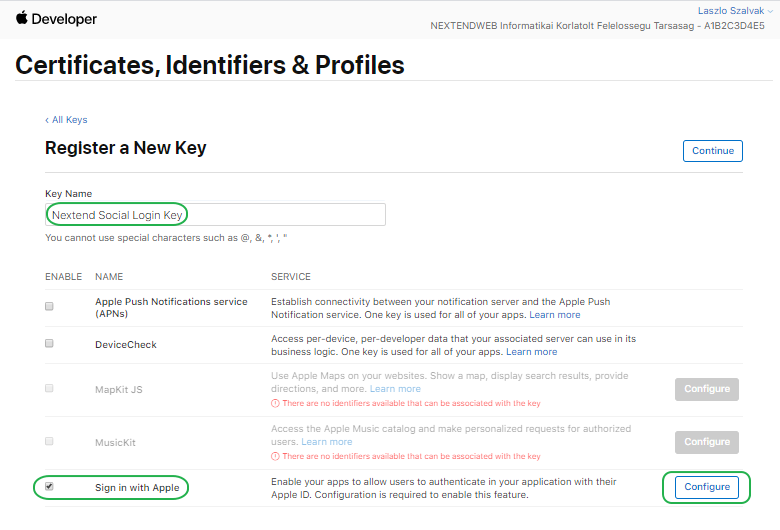
- Enter a name in the Key Name field.
- Tick the “Sign In with Apple” option, then click on “Configure“.
- If you have multiple Apps, then at the “Choose a Primary App ID” field select the App what you just created, then click “Save“.
- Finally press the “Continue” button and then the “Register” button.
- Don’t download the key yet!

3.) Create the Apple Service:
- Go to the “Services IDs” section, what you will find within the “Identifiers” tab.
- Click the blue + icon next to Identifiers, then select the “Services IDs” option and click the “Continue” button.
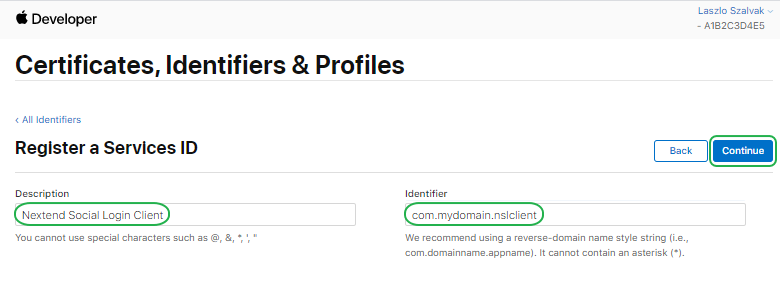
- Enter a “Description“.
- At the “Identifier” field enter your domain name in reverse-domain name style, with the name of the client at its end. E.g.: com.mydomain.nslclient
- Note: This will also be used as “Service Identifier” later!
- Press the “Continue” button and then the “Register” button.
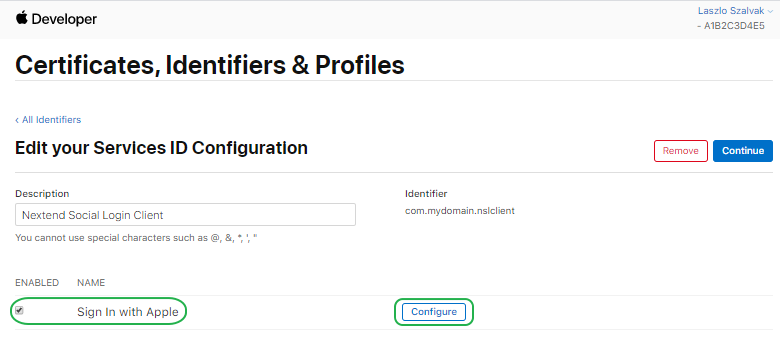
- In the “Services IDs” section, click the service you just created.
- Tick the “Sign In with Apple” option and click the “Configure” button next to it.
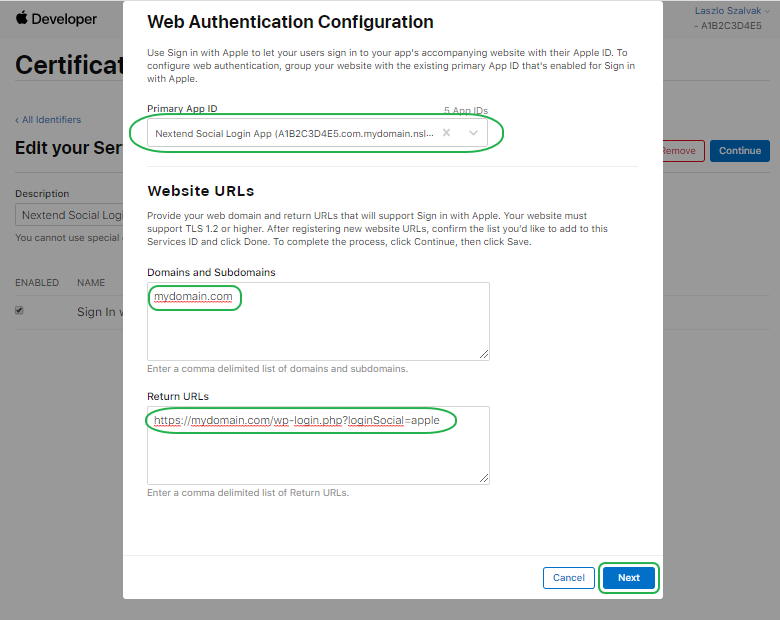
- If you have multiple Apps, then at the “Primary App ID” field select the App what you just created.
- Fill the “Domains and Subdomains” field with the domain that Nextend Social Login suggests
- Add the URL to the “Return URLs” field that Nextend Social Login suggests
- Click the “Next” button then press the “Done” button.
- Finally press the “Continue” button and then the “Save” button.
4.) Configure Nextend Social Login with your credentials
Once everything is done above you’ll need to copy and paste the Private Key ID, Private Key, Team Identifier and Service Identifier to the Apple provider’s Settings tab and Generate a token.
Private Key ID:
Navigate to: https://developer.apple.com/account/resources/authkeys/list
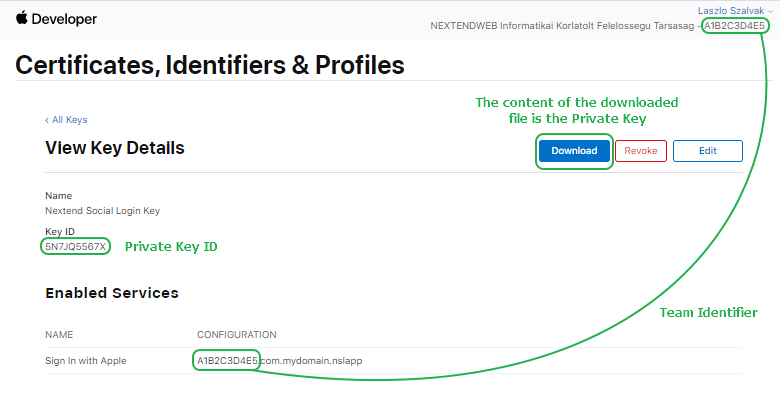
Click on the name of your Key.
You will find your “Private Key ID” under “Key ID”.
Private Key:
Click the “Download” button to download the key file. Once this file is downloaded, it will no longer be available, so make sure you keep this file safe!
Open the downloaded file with a text editor like Notepad, copy all of its contents and paste it into Nextend Social Login’s Private Key field.
Team Identifier:
A 10 character long identifier, what you can find on the top-right corner, just under your name.
Service Identifier:
Navigate to: https://developer.apple.com/account/resources/identifiers/list/serviceId
You will find it under the IDENTIFIER column. If you configured the service according to the suggestions, it will probably end to .nslclient e.g.: com.mydomain.nslclient
When you need to change your credentials for some reason, then you must delete the token, copy the new credentials and generate a new token!
5.) Verifying the settings
After you successfully generated a token, the Client ID and the Client Secret will be filled up automatically. You will need these to verify the setup first. This verification helps you identify possible problems with the app.
Settings
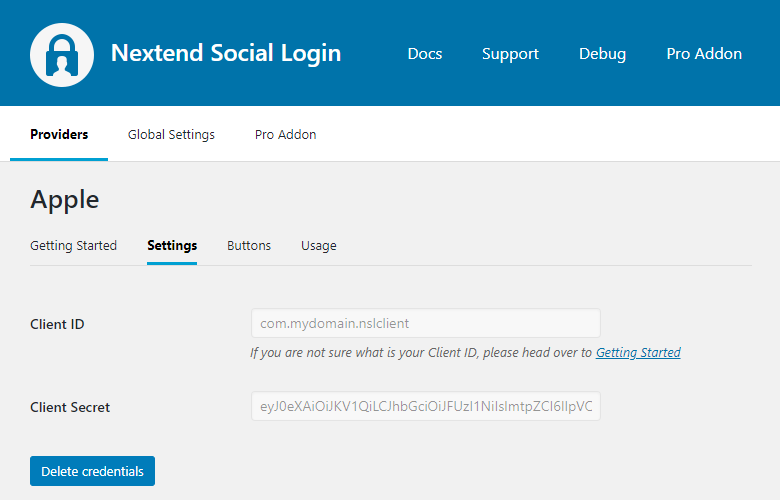
Client ID
The Client ID of your Apple app. The value is defined by the Service Identifier you entered earlier.
Client Secret
The JWT token that was generated from your Private Key ID, Private Key, Team Identifier and Service Identifier. Can not be edited directly! To generate a new token, you need to delete the currently stored JWT token.
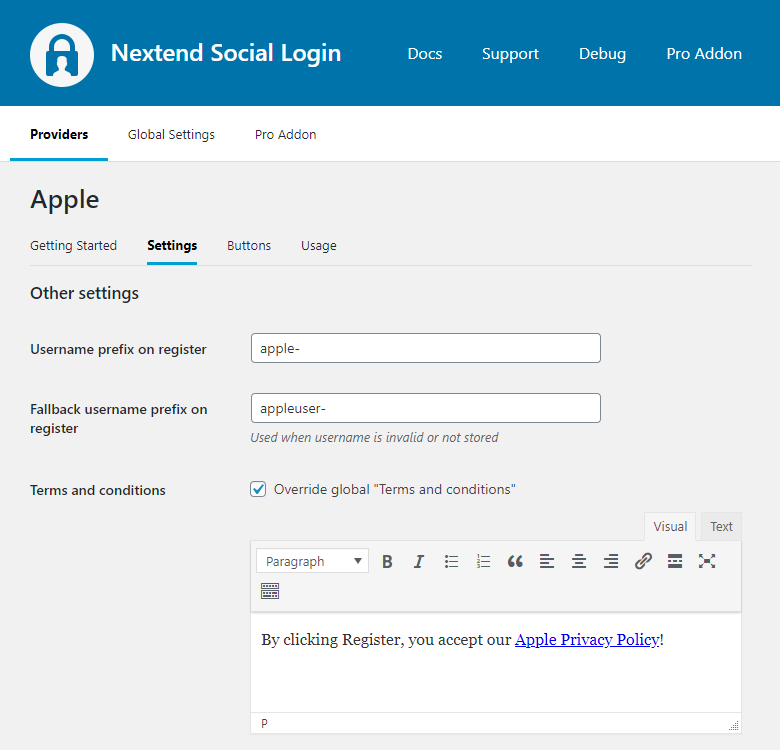
Username prefix on register
Whenever a new user registers with their Apple account they can get a custom prefix so you can easily identify them.
Fallback username prefix on register
Whenever a new user registers with their Apple account and we can not generate a valid username from the first name or last name, a random username will be generated. With this option they can get a custom prefix so you can easily identify them.
Terms and conditions
This option can only be seen, if Terms and conditions is set to Show in Global Settings → Privacy tab. Here you can set custom Terms and Conditions for users who register with Apple. For more information please read our GDPR documentation.
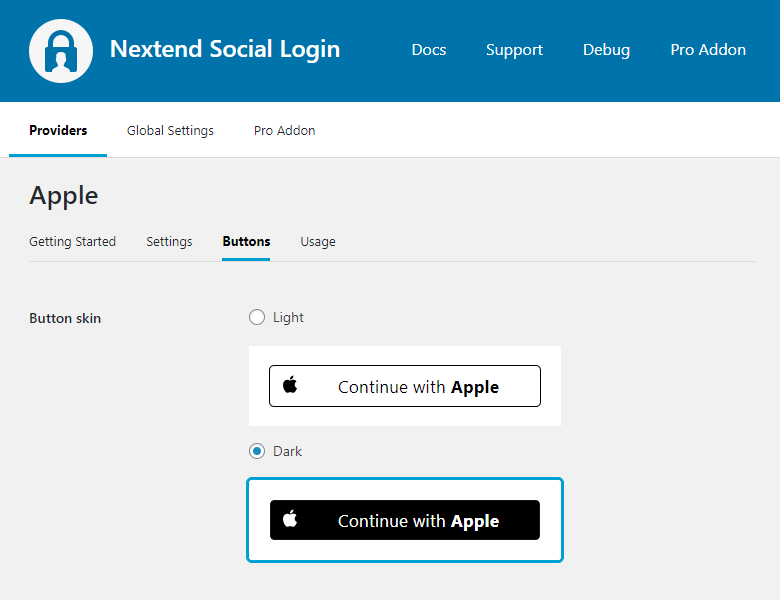
Apple Human Interface Guidelines compatibility
According to the Apple Human Interface Guidelines, the button need to comply with some requirements. At the buttons tab of the Apple provider, there are predefined skins, which comply with those requirements.
Common error messages returned by Apple
Private key format is not valid!
Token generation failed: Private key format is not valid!
The problem is that the entered Private Key is not valid. Make sure you copied everything from the key file you downloaded, including the following parts:
- —–BEGIN PRIVATE KEY—–
- —–END PRIVATE KEY—–
invalid_client
Error: invalid_client
Private Key ID, Team Identifier or Service Identifier is not valid. Delete your current token, insert the proper credentials and generate a new token!
Invalid redirect_uri
invalid_request – Invalid redirect_uri.
The problem is that the entered Return URLs field is not correct for your app. You need to add the “Return URL” what you find at the “Create the Service” section.
ERR_HTTP2_PROTOCOL_ERROR
ERR_HTTP2_PROTOCOL_ERROR NSPOSIXErrorDomain:100
Many web hosts have brute force protection enabled on the wp-login.php which prevent POST requests to wp-login.php for all domains except the originating domain. To fix the problem you need to use our OAuth redirect uri proxy page, as it will make the OAuth flow being handled on the selected page instead of the /wp-login.php.
The username field is empty
Error: The username field is empty.
Error: The password field is empty.
This problem happens because of a problem with the response of Apple, so it won’t return any data when they should. From our experiences, this happen typically when the App was created just recently as it seems Apple needs some time before the App becomes usable. Usually following these steps solves the problem:
- Open private browsing, e.g. Google Chrome Incognito mode. ( Make sure you didn’t have any Incognito tabs opened from earlier, since if you were already logged into Apple there, then you might already have a session. If you had an Incognito tab opened, then please close them all before you open Incognito mode. )
- In Incognito mode, open your website and login with your admin account.
- Try to verify the settings of our Apple provider.
- A popup will appear, and this is the moment when you should log in to your Apple account.
Registration limitations
Apple returns the first name and last name only the very first time a user authorizes your app! This means that, if the registration was not completed after the App authorization, then Nextend Social Login won’t be able to retrieve and store the name of the user the next time! In such cases the name will be empty and a random username will be generated!