Important notice
Before proceeding, please have a look at the Facebook API changes.
Table of contents
- How to enable the provider
- Settings
- Sync data
- Facebook User Experience Design compatibility
- Facebook Data Use Checkup
- Frequently Asked Questions
- Common error messages
- Limitations
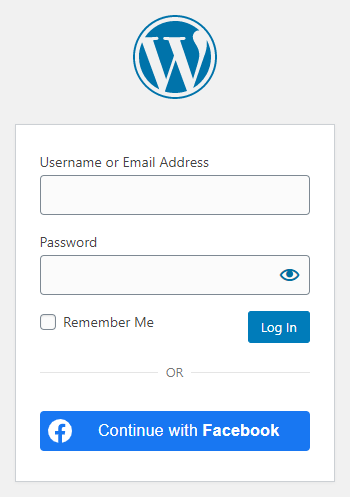
How to enable Facebook login in WordPress
As of February 1, 2023, Facebook requires Business Verification for Advanced Access, which is necessary for the Facebook login feature. This means that, individuals can no longer use Facebook login on their websites to offer social login for their visitors, only verified businesses will be able to use this provider! For more information about this limitation, please check the official statement.
1. Create a Facebook App
To be able to log in via Facebook you must create a Facebook app first.
- Navigate to https://developers.facebook.com/apps/
- Log in with your Facebook credentials if you are not logged in.
- Click on the “Create App” button.
- If presented with a modal, close it or click on the “Create App” button again.
- Fill the “App name” and “App contact email” fields. The specified app name will appear on your Consent Screen!
- Click on the “Next” button and choose the “Authenticate and request data from users with Facebook Login” option, then click on the “Next” button again.
- Optional: choose a “Business portfolio” if you would like to. If you didn’t choose a “Business portfolio” at this point, you will need to select it in step 26, before you start the “Verification”!
- Click on the “Next” button, read the documents listed below the requirements, then click “Next” again.
- Check the App details in the “Overview”, and then press the “Go to dashboard” button.
- Complete the security check if you are prompted with the modal.
- You will end up in the “Dashboard”. If you see a modal window appear, close it or click on “Go to dashboard“.
- Click on the “Use cases” tab on the left side and then click on the “Customize” button that appears next to the “Authenticate and request data from users with Facebook Login” item.
- Below the “Permissions” section, find the “email” permission and click on the “Add” button.
- Press the “Settings” option that you can find below the “Facebook Login” section.
- Into the “Valid OAuth redirect URIs” field, you should add the URL that Nextend Social Login suggests in the backend.
- Click on the “Save changes” button. (If you receive a blank page after you pressed the “Save changes” button, you might need to refresh the page.)
- On the left side in the side bar, click on the gear icon ( “App settings” ) then click “Basic“.
- Enter your domain name to the “App Domains” field.
- Fill up the “Privacy Policy URL” field. Provide a publicly available and easily accessible privacy policy that explains what data you are collecting and how you will use that data.
- Fill up the “Terms of Service URL” field. Provide a publicly available terms and conditions page link, where you describe the rules and guidelines that your visitors must agree to.
- At “User Data Deletion“, choose the “Data Deletion Instructions URL” option, and enter the URL of your page* with the instructions on how users can delete their accounts on your site. To comply with GDPR, you should already offer possibility to delete accounts on your site, either by the user or by the admin:
- If each user has an option to delete the account: the URL should point to a guide showing the way users can delete their accounts.
- If the accounts are deleted by an admin: then you should have a section – usually in the Privacy Policy – with the contact details, where users can send their account erasure requests. In this case the URL should point to this section of the document.
- Select a “Category“, an “App Icon“.
- Scroll down to the bottom of the page, press the “+ Add platform” button.
- Select “Website” platform, then press “Next” and enter the URL into the “Website > Site URL” field that Nextend Social Login suggests in the Getting Started guide within the plugin.
- Press the “Save changes” button.
- By default, your application only has Standard Access for the “public_profile” and “email” permissions, which means that only you can log in with it. To get Advanced Access you will need to go trough the Business Verification, that you can start on the “Review > Verification” tab on the left side.
- After a successful Business Verification, you need to go to the “Review > App Review” tab, and open the review request with the “Edit” button. Fill in any missing fields here, then submit the form for review, and wait until it is approved by Meta, which may take several days.
- Once your verification is completed, click on the “Publish” tab.
- To obtain access to permissions, you must answer some questions about your data handling practices, click on the “Go to data handling questions” link, that you find next to “Data handling questions” and answer questions about the data handling.
- Currently your app is in Development Mode which also means that people outside of your business can not use it. To change this, click on the “Publish” option on the left side again, and publish your app by clicking on the blue “Publish” button at the bottom right corner.
- After everything is done, click on the “App settings” tab, then click “Basic“.
- At the top of the page you can find your “App ID” and you can see your “App secret” if you click on the Show button. These will be needed in plugin’s settings.
2. App setup
Once your Facebook app is ready you’ll need to copy and paste the App ID and App secret to the Facebook provider’s Settings tab. You can find the information at your Facebook app’s Settings which you can reach from the left sidebar.
3. Verifying
Once your App ID and App secret has been added you need to verify the setup first. This verification helps you identify possible problems with the app.
Settings
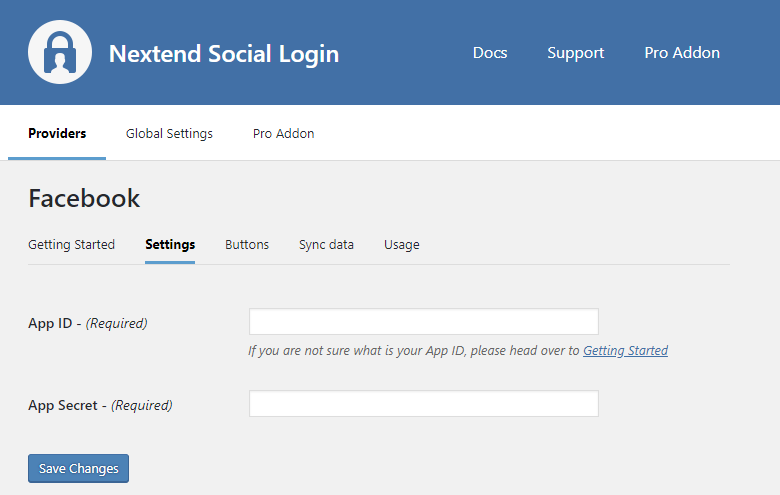
App ID
The App ID of your Facebook app. You can find it at your App → left menu: Settings.
App Secret
The App Secret of your Facebook app. You can find it at your App → left menu: Settings.

Username prefix on Register
Whenever a new user registers with their Facebook account they can get a custom prefix so you can easily identify them.
Fallback username prefix on register
Whenever a new user registers with their Facebook account and we can not generate a valid username from the first name or last name, a random username will be generated. With this option they can get a custom prefix so you can easily identify them.
Terms and conditions
This option can only be seen, if Terms and conditions is set to Show in Global Settings → Privacy tab. Here you can set custom Terms and Conditions for users who register with Facebook. For more information please read our GDPR documentation.
Sync data
By default Nextend Social Login stores the first name, last name, email, avatar url and access token if it is possible, however some additional information can also be retrieved and stored.
When an option is checked, that field will be stored in a meta key with the specified name. The fields are stored in the wp_user_meta table.
NOTE: To use these fields, your app needs an App Review by Facebook, as of Facebook updated their App Review process and API permissions model. More information can be found on the Facebook App Review page.
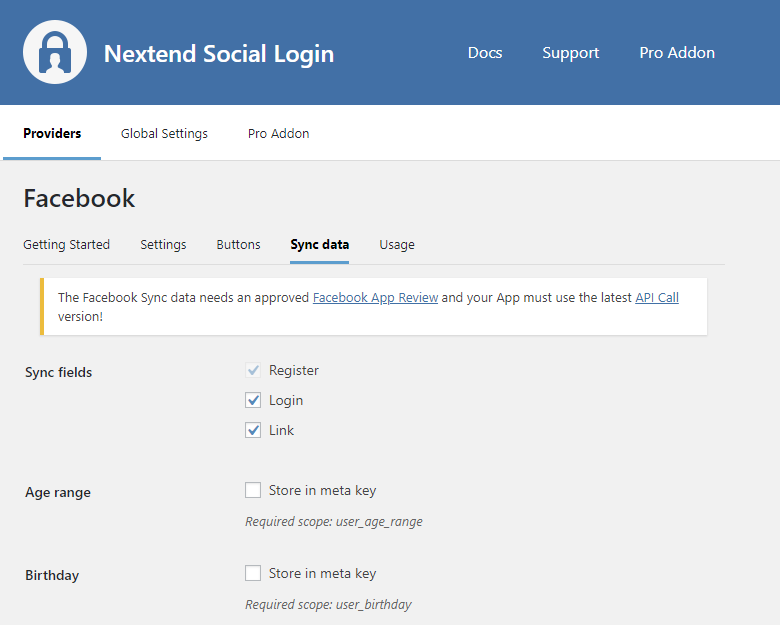
Sync fields
It determines when the synchronization shall happen.
- Register: whenever a new user registers with a provider, their data will be retrieved and stored.
- Login: whenever user logs in with a provider, their data will be retrieved and stored.
- Link: whenever user links and existing WordPress account with a provider, their data will be retrieved and stored.
Age range
Stores the age range of the user, according to Facebook Age Demographic.
Birthday
Stores the user’s birthday.
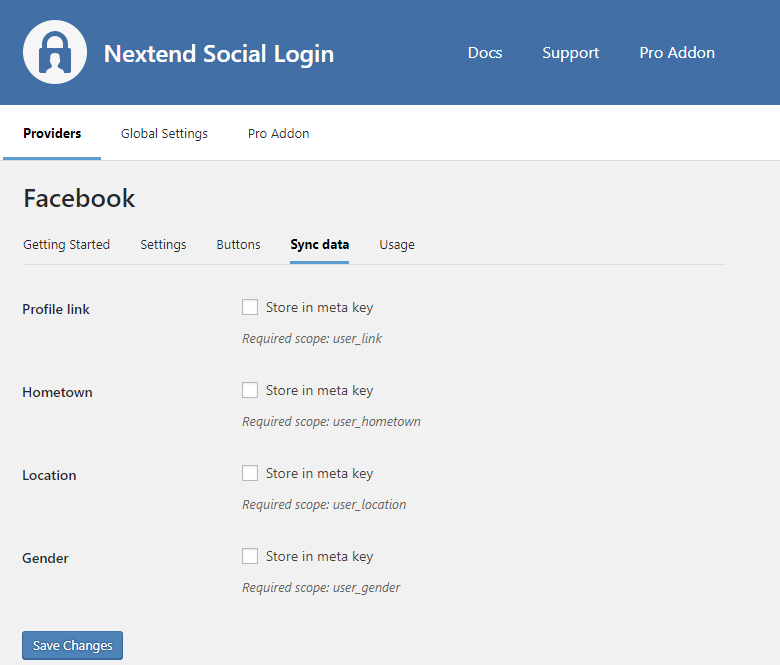
Profile link
Stores a link to the users’ Timeline.
NOTE: Facebook protects the user profile links, so they’ll only resolve the URL, if both conditions met:
1. you are logged in with your Facebook account
2. you are a friend of the persons whose profile link you opened
Hometown
Stores the users’ hometown.
Location
Stores the users’ current location which entered by them on their profile.
Gender
Stores the gender of the user.
Quotes
Stores the users’ quotes.
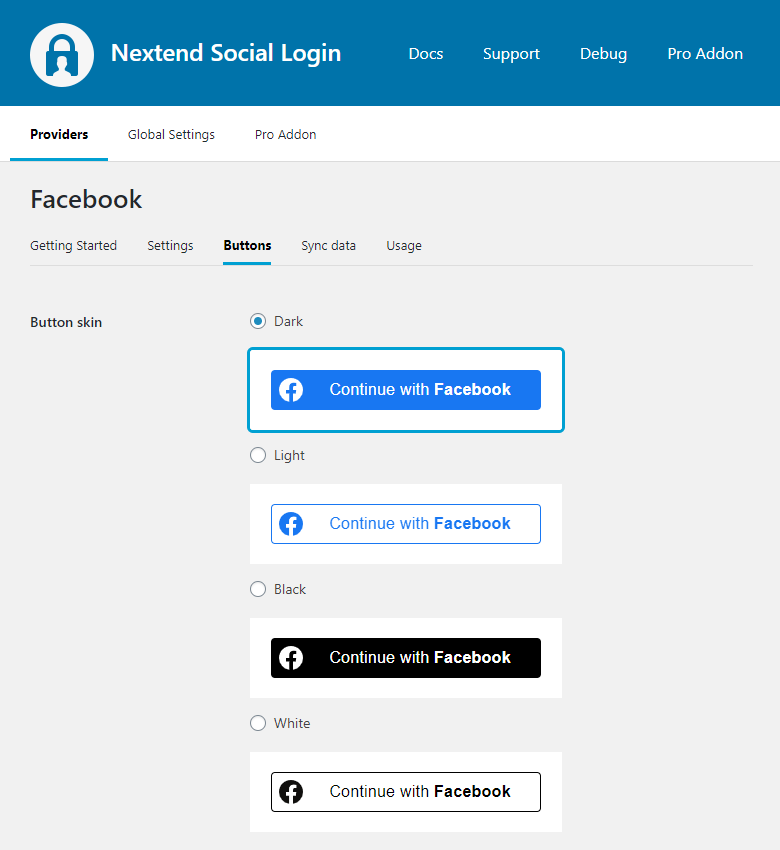
Facebook User Experience Design compatibility
According to the User Experience Design, the button need to comply with some requirements. At the buttons tab of the Facebook provider there are predefined skins, which comply with those requirements.
Facebook Data Use Checkup
To protecting people’s privacy, Facebook requires an annual checkup so they can ensure that your API access and data use comply with the Facebook policies.
If Facebook display the “Data Use Checkup” modal for your App, then make sure you complete it otherwise you may lose the API access.
Once you started the process, Facebook will ask the permissions that you need. In case of Nextend Social Login, we need the following permissions:
- public_profile
so don’t forget to check them under the “Certify Data Use” section, before you continue to the next steps.
Note: If you use the sync data feature of the Pro Addon, then you will also need to select the permissions that we mention on the Sync Data tab for each field.
Frequently Asked Questions
Why can’t I get the user’s email address when they register via Facebook?
There are certain cases when Facebook does not return the user’s email address:
- The user didn’t give permission for the App to access their email
- No Email address on account
- No confirmed email address on account
- No verified email address on account
- User entered a security checkpoint which required them to reconfirm their email address and they have not yet done so
- Users’s email address is unreachable
The problem is described in an official Facebook post. We also set up a test page where you can test whether the user is supposed to get email address. This code is from the official Facebook graph without any changes.
If you feel the email address should be fetched upon registration but it’s not, you should open an official bug report at Facebook.
Common error messages returned by Facebook during verification
Can’t load URL
Can’t load URL: The domain of this URL isn’t included in the app’s domains. To be able to load this URL, add all domains and sub-domains of your app to the App Domains field in your app settings.
The problem is that the App domains field does not contain your site’s current domain. Check the 15th steps of the App setup to fix the problem.
Facebook can also return this message when the Valid OAuth Redirect URIs doesn’t contain the correct OAuth Redirect URL. Check the 12th steps of the App setup to fix the problem.
In some rare cases the problem can happen because of poorly written 3rd party social plugins, so you could also try disabling your other plugins and see if the verification process works. Then when you find the plugin that causes the problem, you should contact its developers to get their plugin fixed.
URL blocked
URL blocked: This redirect failed because the redirect URI is not white-listed in the app’s client OAuth settings. Make sure that the client and web OAuth logins are on and add all your app domains as valid OAuth redirect URIs.
The problem is that the entered Valid OAuth redirect URIs field is not correct for your app. Check the 12th step of the App setup to fix the problem.
Error validating verification code
Error validating verification code. Please make sure your redirect_uri is identical to the one you used in the OAuth dialog request
The problem is that the entered Valid OAuth redirect URIs field is not correct for your app. Check the 12th step of the App setup to fix the problem.
Invalid App ID
Invalid App ID: The provided app ID does not look like a valid app ID.
The entered APP id is not correct. Maybe the app with the entered ID was deleted. Go to the Facebook provider → Settings and make sure that an existing App’s ID and secret was entered.
Client secret error
Error: Error validating client secret
The App secret you copied from the Facebook app is invalid. Make sure the correct one was copied.
Unable to validate CSRF state
Error: Unable to validate CSRF state
The problem is related to the server’s cookie related caches. Some servers only accept special cookie name as the caching server allows only these special cookie names. You should get in touch with your host and ask them about their cookie related caches.
If you’re using Pantheon server, update your Nextend Social Login version to 3.0.6 or greater where the error should be fixed.
Appsecret proof error
Error: API calls from the server require an appsecret_proof argument
The problem is that the appsecret_proof argument got turned on at your API. You should turn it off.
Nextend Social Login currently does not use appsecret_proof as it does not need it, but it will support this setting from version 3.0.10.
App not setup
App not setup: This app is still in development mode, and you don’t have access to it. Switch to a registered test user or ask an app admin for permissions.
The problem is that the Facebook app wasn’t published. Check the 27th step of the app configuration to learn how to publish your app.
App not active
This app is not accessible right now and the app developer is aware of the issue. You will be able to log in when the app is reactivated.
The problem is that you Facebook app is either in Development mode, or Meta blocked your App as it violated the Meta guidelines or you ignored some actions that Meta requested you to do.
- First of all make sure you switched the App to live mode.
- If it is already in live mode, check the “Required actions” section of your App, and fix all mentioned problems. Once all possible problems are fixed you might need to submit an appeal.
Feature unavailable
Feature unavailable: Facebook Login is currently unavailable for this app.
This error means that you don’t have the Facebook Login product added to your app. Probably you created your Facebook App in a way other than we described in the guide above, as it should add the Facebook Login product by default.
Facebook Login is currently unavailable
Feature Unavailable: Facebook Login is currently unavailable for this app, since we are updating additional details for this app. Please try again later.
This error usually occurs if your App doesn’t have Advanced Access for the “email” and “public_profile” permissions. Without Advanced Access, people outside of your Business won’t be able to login, as only those accounts are able to authenticate via your App, that have some kind of role assigned ( e.g. Tester, Developer, etc. ) in your App.
To be able to get advanced access, you need to go trough a Business Verification as we described in step 23.
If Meta has already approved your Business Verification request, but you still see this error message then it is also possible that your App has some basic information missing. You should check if you added a Privacy Policy URL, User Data Deletion( you can find more information about this in our Facebook – Getting Started section ), selected a Category / Sub-Category, chose an App Icon, and selected an App Purpose All of these can be modified in your Facebook App under Settings > Basic.
Limitations
Don’t replace the Facebook App if you have users connected with Facebook
Whenever a person connects with Facebook login, an ID will be created, which is unique for the specific Facebook app that the login happened over. If the same person tries to login over another Facebook App, the person will receive another, completely different ID.
In Nextend Social Login, we use these IDs to recognize the WordPress account that the Facebook account was linked with. So if you replace the Facebook App, users with linked Facebook Accounts will no longer be able to login with the new App.
If you really need to replace the Facebook App, then users with linked Facebook accounts can only login with Facebook, if the person:
- logs in with the traditional username and password form or maybe with another provider that is also linked to the account
- unlinks the currently linked Facebook account
- and links the Facebook account again, using the new Facebook App
Each user can find the Link and Unlink buttons on the WordPress default profile page, e.g.:
- https://yoursite.com/wp-admin/profile.php
or you can display the Link and Unlink buttons using:
- the Nextend Social Login widget with Show link/unlink buttons enabled
- or the shortcode with the link and unlink parameters.
Facebook login fails in WebView ( Embedded Browsers )
For your account security, logging into Facebook from an embedded browser is disabled. To continue, download and log into the Facebook app on your device and try again.
If you receive the error message above, that means you are trying to login trough an embedded browser. On October 5, 2021, Meta officially deprecated the Facebook login over Android embedded browsers (WebViews) for logging in users.
Since the login can not work anyways, starting with Nextend Social Login version 3.1.3, we will hide the Facebook button in embedded browsers, just like we do in case of Google.
According to the official documentations of Facebook, App developers should rather launch links in external browsers or use Custom Tabs.